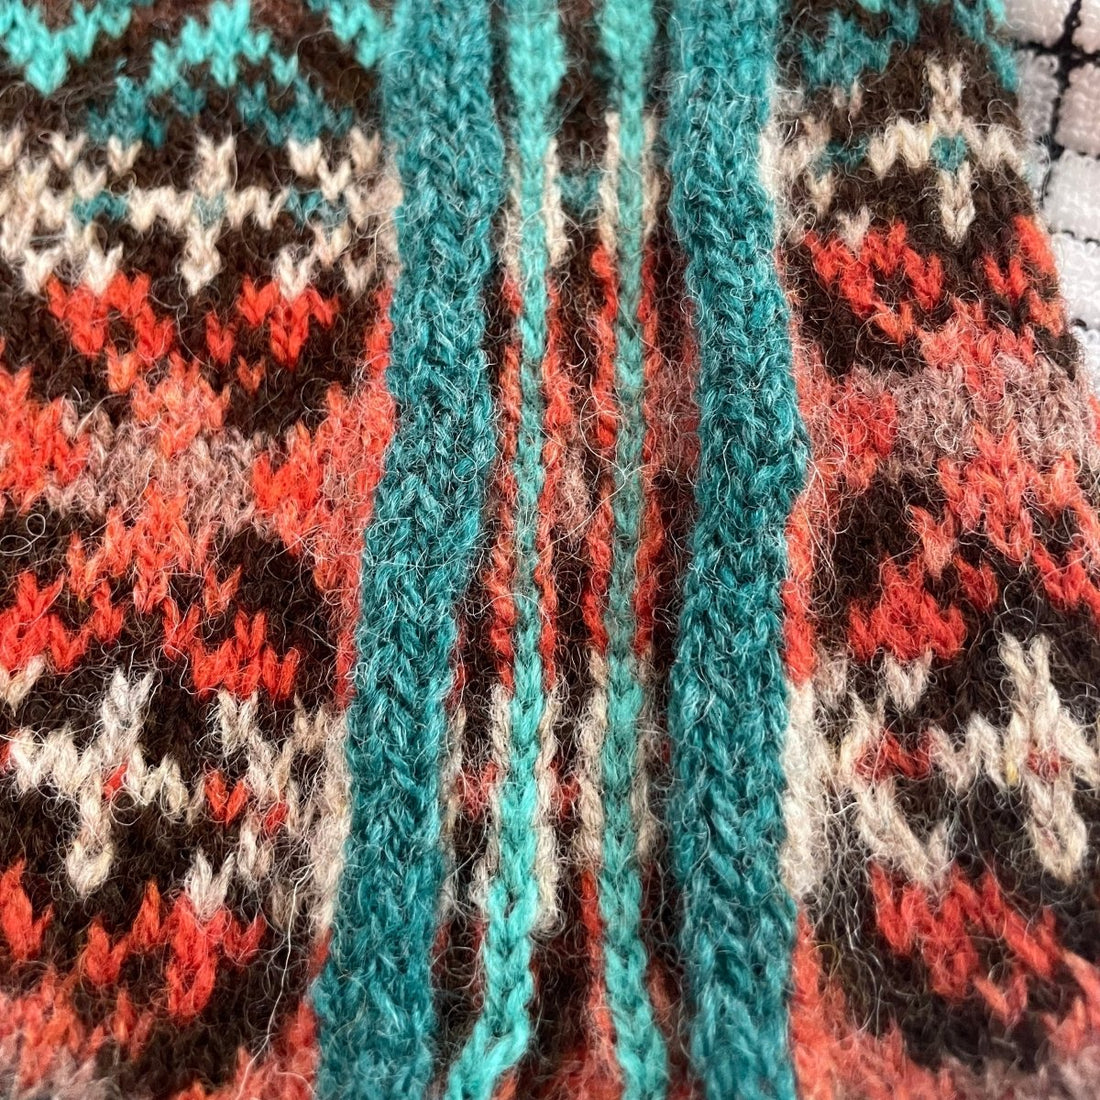
Reinforcing the steek is technically optional but highly recommended: it is one of those steps that will make your life easier, and is definitely worth the time invested.
When discussing the reinforcement, there are areas of the steek flap that you should be paying attention to: the very centre column, and the columns of stitches to each side of that middle column (referred to henceforth as the flank columns). Essentially, the goal is to first secure the loose ends in each of the flank columns, either by sewing or crocheting tightly, before cutting down the centre of the middle column.
For a machine sewn steek, a line of stitches is sewn down each of the flank columns. This is not a technique I ever use, as I don’t own a sewing machine, so I am likely not the best person to give advice on machine sewn steels, but there are lots of YouTube videos demonstrating the technique.
For a standard crochet steek, use a hook that will give you a tight tension, usually a size or two smaller than the needles used to create the fabric. A single chain is then worked along the outer edge of each flank column, using the outside leg of the flank stitch along with the neighbouring leg of the stitch beside it, so that both colours used in the round are firmly secured by the new crochet chain that is being made. Again, if you are a person who likes visuals, check out YouTube — there are some excellent tutorials there!
When I did my first steek, it was before there was much knitting content on YouTube, and so I followed written instructions for a crocheted steek. I misunderstood the instructions, and came out with a technique that is a bit fussier than the above two methods, but results in a flatter fabric than the crochet method. In terms of effectiveness, it is on par with both the standard crochet and sewn reinforcement.
I haven't seen a similar method detailed anywhere else, as it mostly comes from my own misunderstanding, but I like the results so I'll describe it here in case anyone else would like to try it:

short version: Effectively, you are crocheting a single chain with a contrasting colour for each knit row, through the middle of each stitch in the flank column, through the fabric and picking up the new chain stitch at the back of the work. If it helps to visualize, the crochet hook is performing the same function as a sewing machine needle, with the yarn attached to the ball acting like the bobbin thread. This should be done with a hook a size or two smaller than the needle used to create the fabric, and should be reasonably snug but not aggressively tight.
long version:
Using a contrasting yarn, make a slip knot on the end of a crochet hook that is a size or two smaller than the needle used to create the fabric. The end of the yarn that is attached to the ball should run along the wrong side of the work, while the crochet hook will enter the work from the right side of the knitting.
- Insert the crochet hook into the middle of the flank stitch, and pick up the ball thread. Pull this thread (and not any others) up through the work. There are two stitches on the crochet hook now.
- Slip the stitch that was just created through the original stitch that was on the hook. One stitch remains on the crochet hook.
Repeat the above two steps for each stitch in the column. Try to keep a snug, tight tension, you do not need to be overly aggressive, but it should feel sturdy. It will look like you have inserted a new row of knit stitches in the new colour.
The result of this will be what is effectively a chain stitch running through the middle of the flanking column. Leave about an inch tail at either end, when cut. Repeat on both sides of the middle stitch.
Next up…choose violence!

